昨天Nanobanana 2 上線了,
正式名稱叫 Gemini-3.1-Flash-image。
看名字就知道了,
它的特點就是:快,好,省。
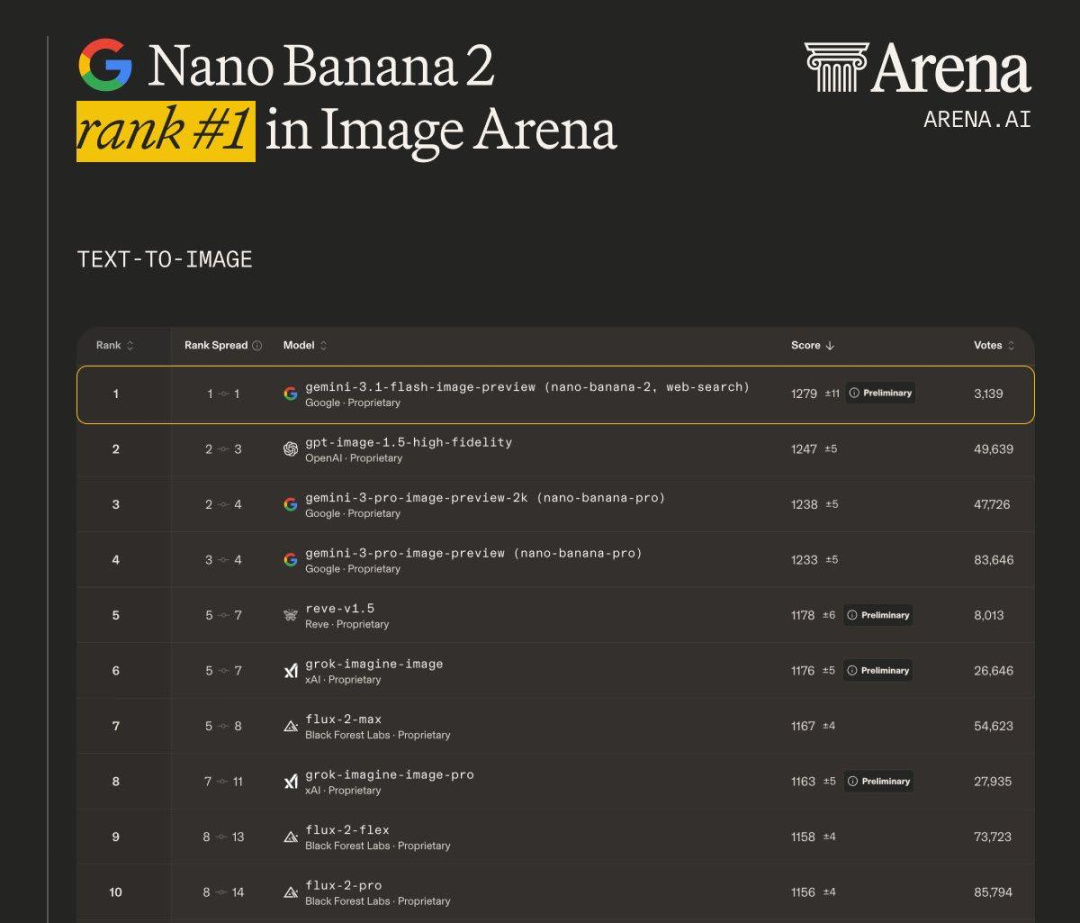
在 Image Arena 中Score目前第一。
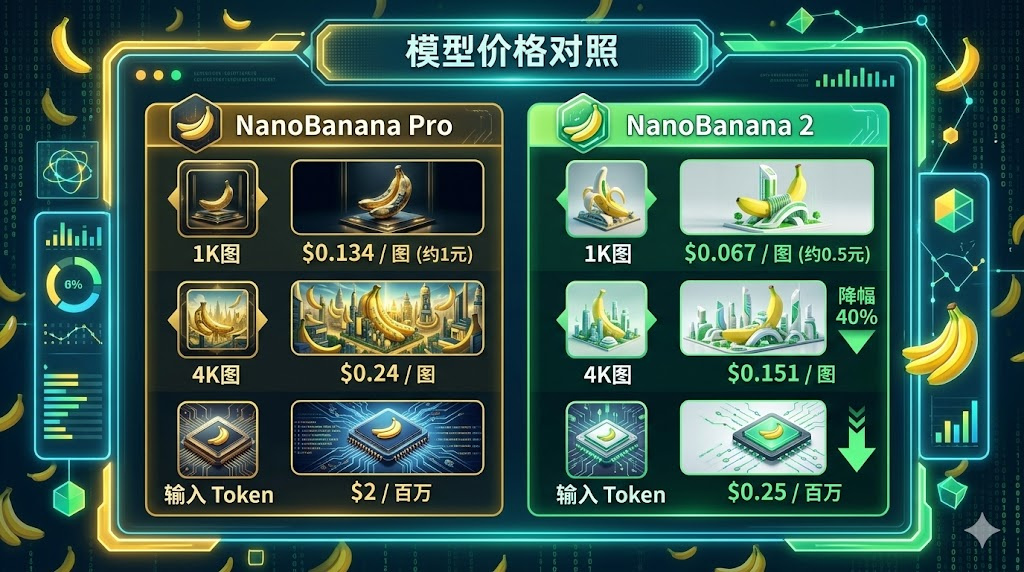
先說說生圖之外的參數吧:
生成速度顯著提升,價格約爲 Nano Banana Pro 的一半。畫面質量與之前基本持平甚至在某些場景更好,
Nanobanana 2 支持的畫質也和 Pro 持平,也能生成4k畫質,性價比極高。
目前我發現有這幾個場景,
banana2的出圖效果是比 banana Pro 好的。
多參
Nanobanana2 的一致性更好,
最多能一口氣加入五個參考角色進行生圖。

這圖真的太抽象了。。。
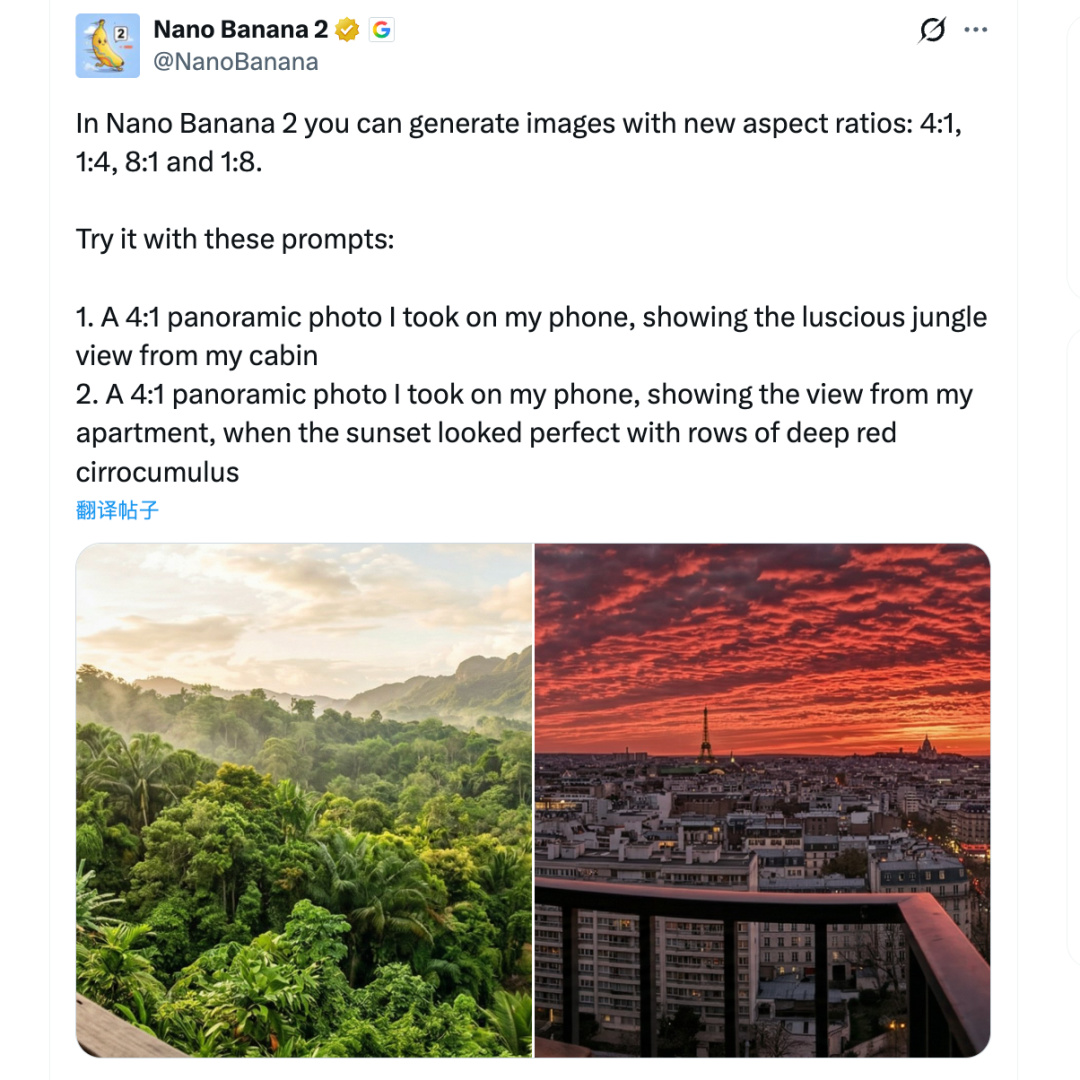
多比例
傳統的 16:9, 3:4, 21:9,啥模型都能幹。
那像4:1,8:1 這種刁鑽比例,banana2 居然也支持。
比如這張圖,就是用 Nanobanana2 做出來的,
Nanobanana Pro 無法做出來。

(不知道發到小黑盒會不會壓縮畫質,我這裏看是小字很清晰的)
生成這種長條海報真是有手就行,連裁剪都不需要了。
Prompt:生成一張中學生遇到心理問題正確處理方式的縱軸介紹圖,科普風格,方便中學生學習接納,1:8。
長圖警告⚠
縱軸圖生成好之後,咱再來試試橫軸全景圖。
Prompt:一張用我手機拍攝的4:1 全景照片,我住在日式雙層公寓中,星空美麗,日式二次元街景,令人驚歎的星夜,新海誠《你的名字》風格。
還有一個我超喜歡的進化演變圖,之前只能用 21:9 比例來做,現在 8:1 的效果超好。

這張圖提示詞有幾千詞,避免影響觀感就不在文中發了。
如果有需求的盒友需要,我發評論區喵。
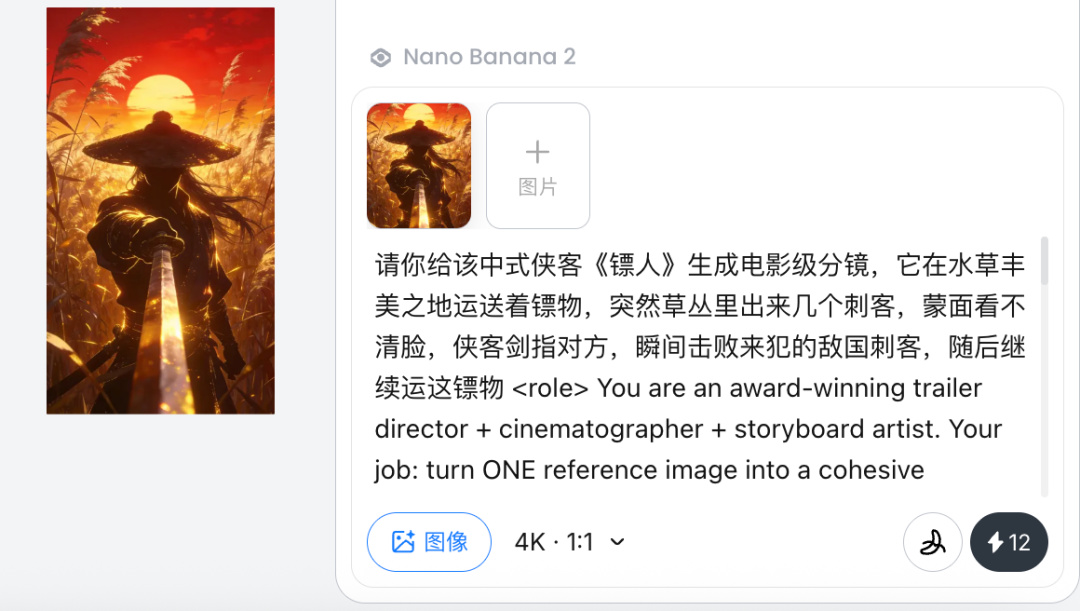
細節更好
Nanobanana2 對細節的把控也增強了,
試試用它一口氣生成電影級分鏡。
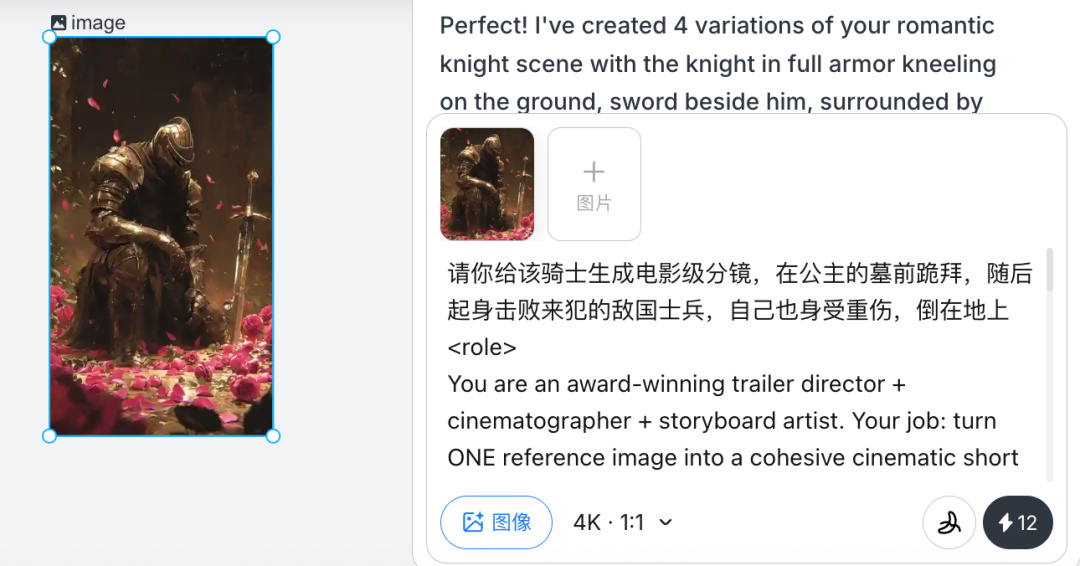
效果是真不錯。
焚訣提示詞附上:
Prompt:
<role>
You are an award-winning trailer director + cinematographer + storyboard artist. Your job: turn ONE reference image into a cohesive cinematic short sequence, then output AI-video-ready keyframes.
</role>
<input>
User provides: one reference image (image).
</input>
<non-negotiable rules - continuity & truthfulness>
First, analyze the full composition: identify ALL key subjects (person/group/vehicle/object/animal/props/environment elements) anddescribe spatial relationships and interactions (left/right/foreground/background, facing direction, what eachis doing).
Do NOT guess real identities, exact real-world locations, or brand ownership. Stick to visible facts. Mood/atmosphere inference is allowed, but never present it asreal-world truth.
Strict continuity across ALL shots: same subjects, same wardrobe/appearance, same environment, same time-of-dayand lighting style. Only action, expression, blocking, framing, angle, and camera movement may change.
Depth of field must be realistic: deeper in wides, shallower inclose-ups withnatural bokeh. Keep ONE consistent cinematic color grade across the entire sequence.
Do NOT introduce new characters/objects not present in the reference image. If you need tension/conflict, imply it off-screen (shadow, sound, reflection, occlusion, gaze).
</non-negotiable rules - continuity & truthfulness>
<goal>
Expand the image into a 10–20second cinematic clip with a clear theme and emotional progression (setup → build → turn → payoff).
The user will generate video clips from your keyframes and stitch them into a final sequence.
</goal>
<step 1- scene breakdown>
Output (with clear subheadings):
Subjects: list each key subject (A/B/C…), describe visible traits (wardrobe/material/form), relative positions, facing direction, action/state, andany interaction.
Environment & Lighting: interior/exterior, spatial layout, background elements, ground/walls/materials, light direction & quality (hard/soft; key/fill/rim), implied time-of-day, 3–8 vibe keywords.
Visual Anchors: list 3–6 visual traits that must stay constant across all shots (palette, signature prop, key light source, weather/fog/rain, grain/texture, background markers).
</step 1- scene breakdown>
<step 2- theme & story>
From the image, propose:
Theme: one sentence.
Logline: one ********ed trailer-style sentence grounded in what the image can support.
Emotional Arc: 4 beats (setup/build/turn/payoff), one line each.
</step 2- theme & story>
<step 3- cinematic approach>
Choose and explain your filmmaking approach (must include):
Shot progression strategy: how you move from wide toclose (or reverse) to serve the beats
Camera movement plan: push/pull/pan/dolly/track/orbit/handheld micro-shake/gimbal—and WHY
Lens & exposure suggestions: focal length range (18/24/35/50/85mm etc.), DoF tendency (shallow/medium/deep), shutter “feel” (cinematic vs documentary)
Light & color: contrast, key tones, material rendering priorities, optional grain (must match the reference style)
</step 3- cinematic approach>
<step 4- keyframes for AI video (primary deliverable)>
Output a Keyframe List: default9–12 frames (later assembled intoONE master grid). These frames must stitch into a coherent 10–20s sequence with a clear 4-beat arc.
Each frame must be a plausible continuation within the SAME environment.
Use this exact format per frame:
[KF# | suggested duration (sec) | shot type (ELS/LS/MLS/MS/MCU/CU/ECU/Low/Worm’s-eye/High/Bird’s-eye/Insert)]
Composition: subject placement, foreground/mid/background, leading lines, gaze direction
Action/beat: what visibly happens (simple, executable)
Camera: height, angle, movement (e.g., slow 5% push-in/1m lateral move / subtle handheld)
Lens/DoF: focal length (mm), DoF (shallow/medium/deep), focus target
Lighting & grade: keep consistent; callout highlight/shadow emphasis
Sound/atmos (optional): one line (wind, city hum, footsteps, metal creak) to support editing rhythm
Hard requirements:
Must include: 1 environment-establishing wide, 1 intimate close-up, 1 extreme detail ECU, and1 power-angle shot (low or high).
Ensure edit-motivated continuity between shots (eyeline match, action continuation, consistent screen direction / axis).
</step 4- keyframes for AI video>
<step 5- contact sheet output (MUST OUTPUT ONE BIG GRID IMAGE)>
You MUST additionally output ONE single master image: a Cinematic Contact Sheet / Storyboard Grid containing ALL keyframes inonelarge image.
Default grid: 3x3. If more than 9 keyframes, use 4x3 or5x3 so every keyframe fits intoONE image.
Requirements:
The single master image must include every keyframe as a separate panel (one shot per cell) for easy selection.
Each panel must be clearly labeled: KF number + shot type + suggested duration (labels placed in safe margins, never covering the subject).
Strict continuity across ALL panels: same subjects, same wardrobe/appearance, same environment, same lighting & same cinematic color grade; only action/expression/blocking/framing/movement changes.
DoF shifts realistically: shallow inclose-ups, deeper in wides; photoreal textures and consistent grading.
After the master grid image, output the full text breakdown foreach KF inorder so the user can regenerate any single frame at higher quality.
</step 5- contact sheet output>
<final output format>
Output in this order:
A) Scene Breakdown
B) Theme & Story
C) Cinematic Approach
D) Keyframes (KF# list)
E) ONE Master Contact Sheet Image (All KFs inone grid)
</final output format>最後生成出來的電影分鏡,可直接放到 Seedance2.0 中生成。
(黑盒文章沒法插入視頻嗚嗚嗚)
這個 Case 就當做課堂作業,朋友們可以自己去試試~
(如果你是用 Lovart 的話,每天會贈送免費積分,生成幾張 Nanobanana2 圖片是沒問題的)
我還發現一個邪修,衆所周知,
Nanobanana Pro生圖很牛逼,但就是慢。
我在 Lovart 上傳了一整部小說,讓它用 Nanobanana 2 一口氣生成50 張圖片。
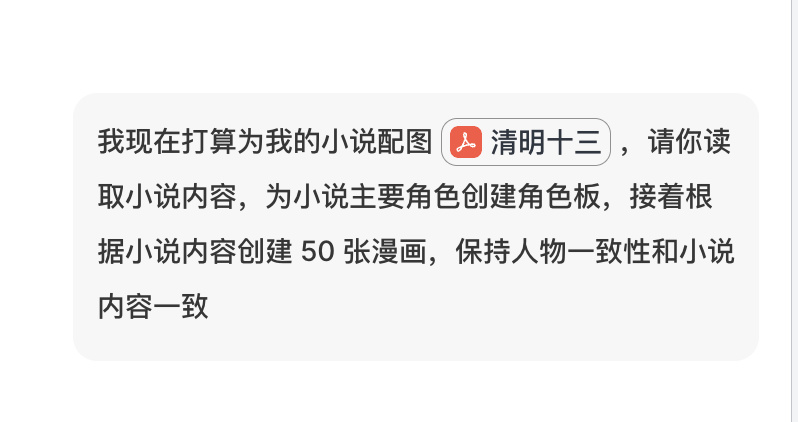
文字清晰,人物一致性穩定,沒毛病。
最後就是最近 Skill 這個概念超火,原本是 Claude code 上,本質上是語義封裝。
沒想到 Lovart 也整了個,
給Nanobanana2生圖模型搞 Skill,太抽象了。。。
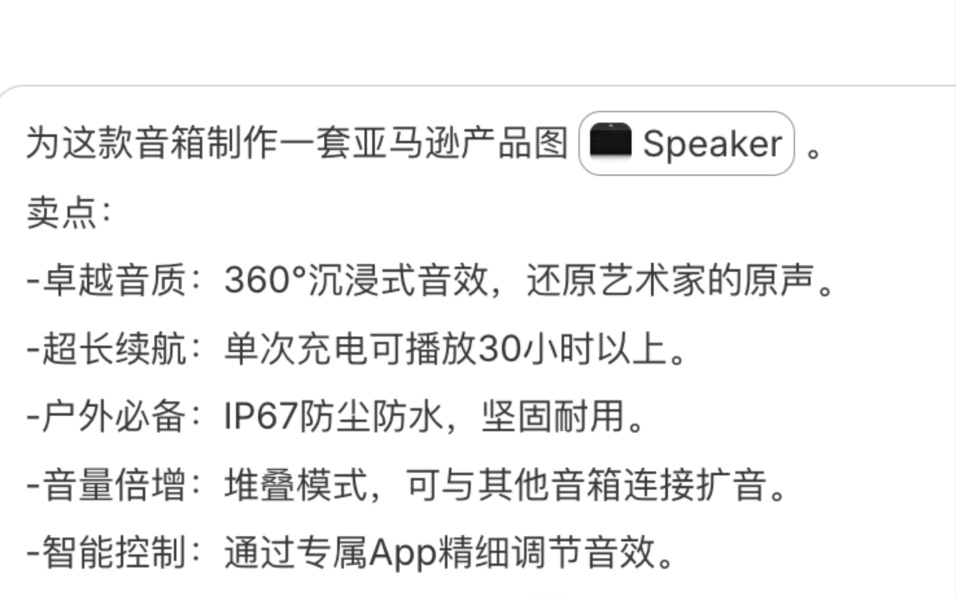
用 Skill 一鍵生成電商產品套圖,emmm 確實比以前方便一點。
個人感覺Nano Banana 2 最大的突破,
在於它將 Pro 版本的 4K 高清輸出和複雜空間推理能力,
下放到了 Flash 架構中。
有點像你不再需要在 Gemini 中“Fast”和“Thinking”兩種模式之間做選擇。
畢竟小孩子才做選擇,我全都要。
至於其他的部分,
banana Pro 已經做得非常好了,
Nanobanana 2 也沒啥提升空間。
曉風乾丨 大四 Base北京 AI產品在職
想縮小科技帶來的信息差 分享很酷的AI玩法。
希望得到您的點贊轉發愛心三連支持。
更多遊戲資訊請關註:電玩幫遊戲資訊專區
電玩幫圖文攻略 www.vgover.com


